Separator Sheets
Some deposit patterns can use separator sheets between the layers of parts to make the deposit more stable. Turning on the Separator Sheet switch when editing a Deposit adds another pallet holding the separator sheets.
Deposit Panel

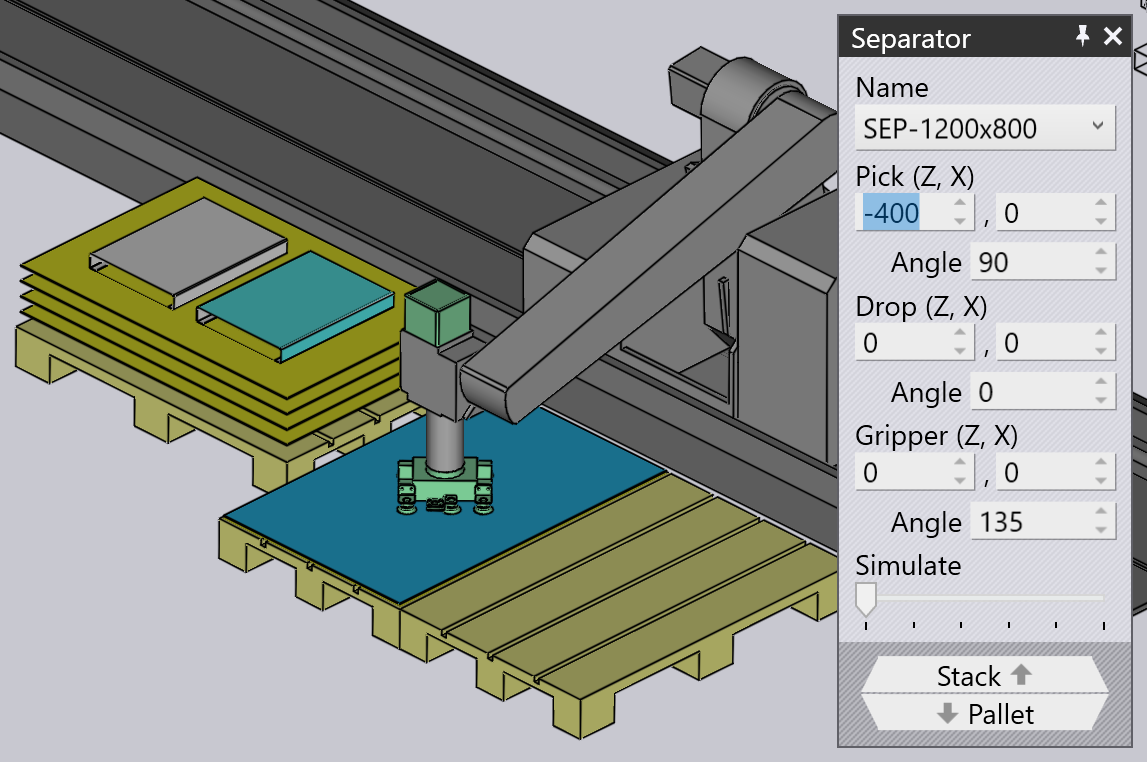
You can click on the separator sheet in the simulation to bring up the Separator Sheet panel shown above.
-
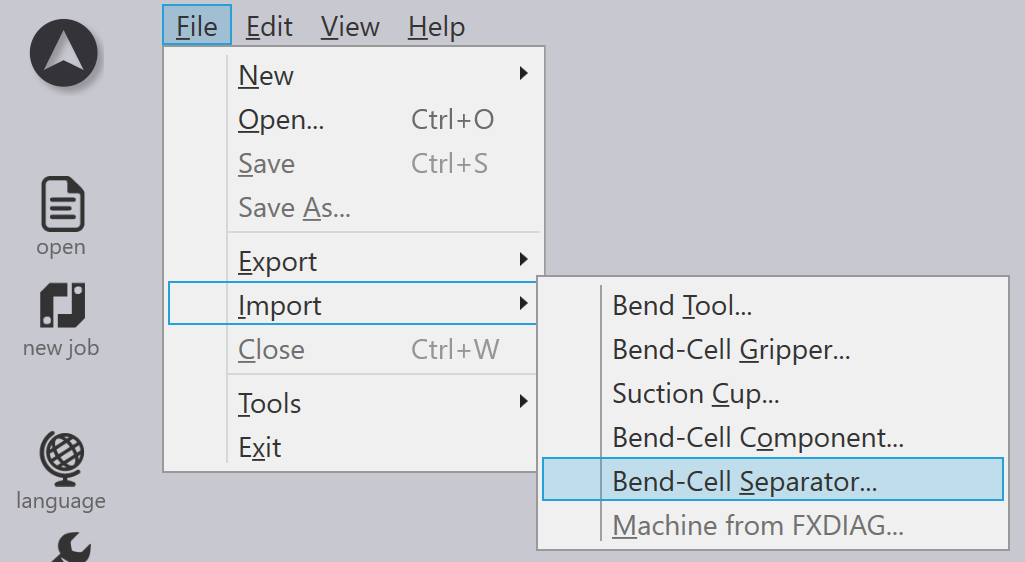
The Name selector can be used to pick a different separator sheet. You can choose the Import… link in this selector.
-
The Pick section is used to set up the position and orientation of the separator sheet on the pick-up pallet. In the image above, the separator sheet has been rotated 90 degrees, and shifted to one side of the pallet.
-
The Drop section is used to set up the position and orientation of the separator sheet on the deposit stack.
-
The Gripper section is used to set up the position and orientation of the gripper on the separator sheet. This could be used to move the gripper away from any slots or holes in the separator sheet. (The image above shows the gripper rotated 135 degrees from the default orientation).
-
The Simulate slider can be used to simulate only the separator sheet cycle so changes you make in the settings above can be quickly tested.
-
The Stack link is used to switch to the deposit editing, and the Pallet link is used to edit the position and orientation of the pallet on which the separator sheet is placed.
Custom separator sheets
You can also import a custom separator sheet from the File menu:

If this works correctly, an import message like this is displayed (otherwise, a suitable error message is displayed). The format of the DXF or GEO file for defining a custom separator sheet is explained on this page.

Weight Check
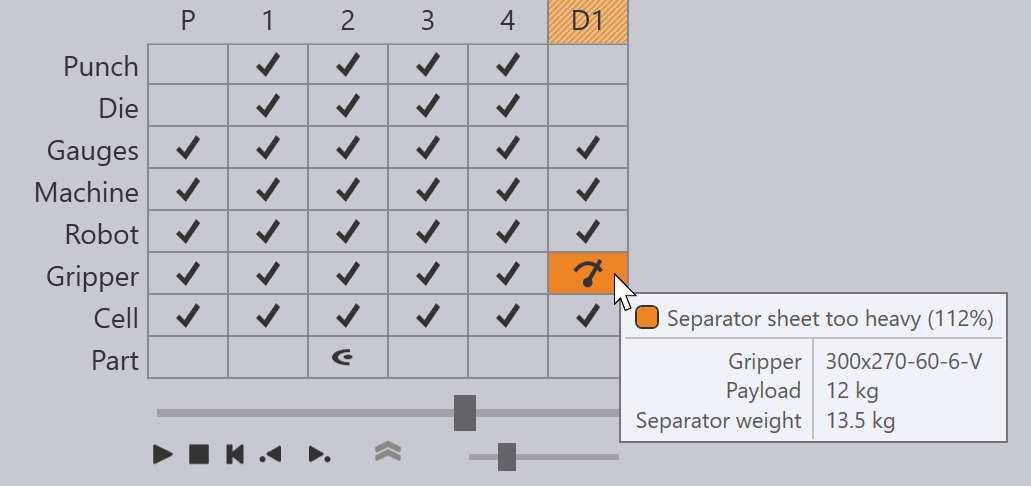
The separator sheet may be too heavy for the gripper. In that case, you can see an error indicator in the navigator panel, and pointing to the error displays more details about the overload.

Suction Check
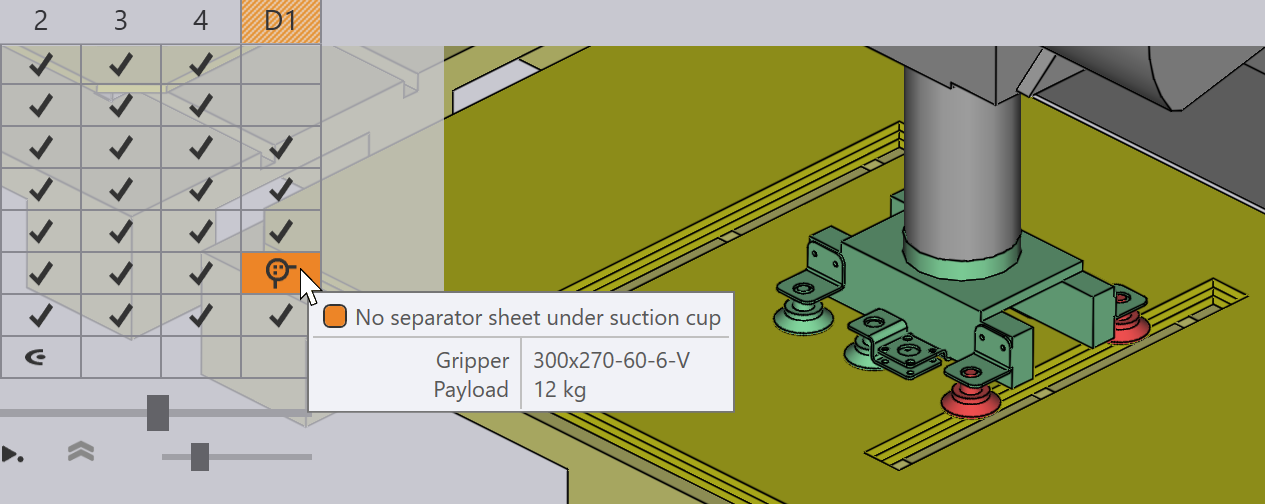
If the suction cups lie on top of a hole on the separator sheet, the loss of suction is detected and displayed as an error in the Gripper row of the Deposit.
