Regripping
The way in which the gripper holds the part might need to be changed between some bends. For example, the gripper might need to hold the part from the other side, or we might need to shift the grip position to avoid a collision with the machine table. This is done by a regrip operation.
The robot gripper releases the part, moves to the new orientation and re-grips the part. During this time, the part can be secured by the regripping stations, or (if the part is small enough) clamped between the punch and die. Such a clamped regripping can happen before the bend (part clamped in flat position), or after the bend (part clamped in post-bend position).
There are various settings used to control the regripping process: * Are regripping stations used? * The positions of the regripping stations. * The arm configuration of the regripping stations (lengths and angles of the arms holding the suction cups). * The position of the part on the regripping station. * The new position of the gripper (post-regrip) on the part.
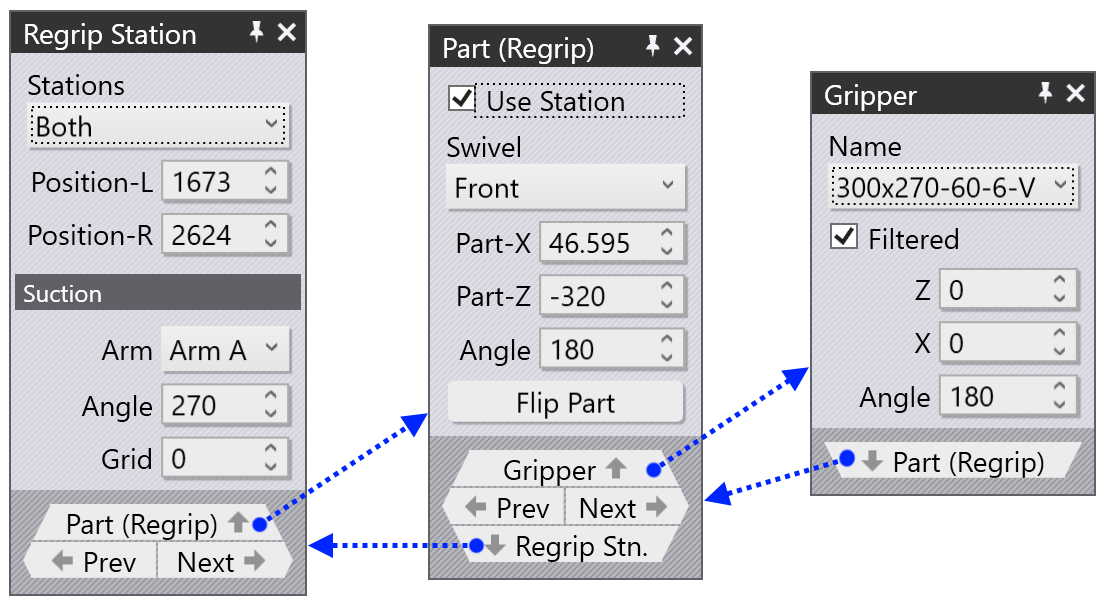
These settings are edited using three different panels, which are accessed just by displaying different objects on the screen.
-
The Regrip Station panel is accessed by clicking on one of the two regripping stations.
-
To edit the part position during regripping, click on the part while a regrip operation is selected - this is the Part (Regrip) panel.
-
Click on the gripper during a regrip operation, to edit the new re-take position of the gripper on the part (the Gripper panel).
In addition, all these different panels have up/down navigation links linking them to other panels in a logical sequence.
Regrip Station panel
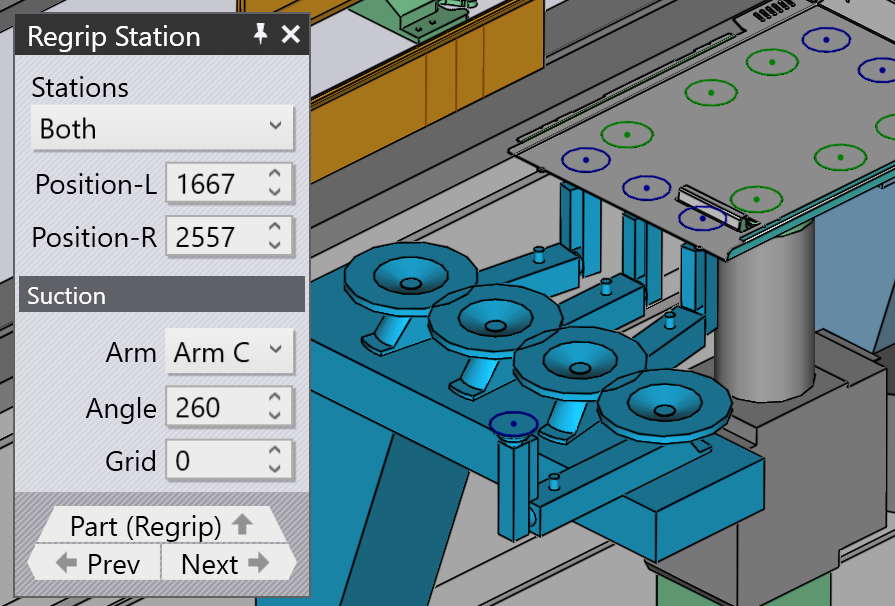
The Regrip Station panel is used to configure the regripping stations (which ones are used, their positions, the arm configurations). You can open this panel by clicking on one of the regripping stations.
-
Use the Stations selector to pick which regripping station is used. Typically both are used, but for some small parts, it may be better to use only one of them. If you change this, Flux will recompute a new part position, and new robot routes automatically.
-
Use the Position-L and Position-R settings to adjust the station positions on the rail.
-
The Prev and Next links are displayed if there are multiple regrip operations in this part, and are used to navigate between them.
-
The Part (Regrip) link is used to edit the resting position of the part on the regrip stations.
The settings in the Suction section are used to configure the suction arms.
-
Use the Arm selector to select one of the suction cup arms (the one closest to the machine is Arm A).
-
Use the Angle setting to rotate the arm around (in 5° steps).
-
Use the Grid setting to extend/retract the arm (in 10mm steps).
As you reconfigure the regrip station, Flux checks for collisions with the part, the robot, the gripper in real time and updates the status indicators immediately.
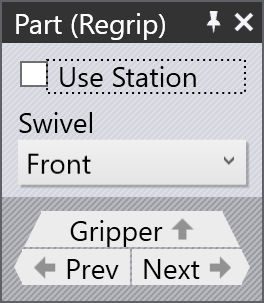
Part (Regrip) panel
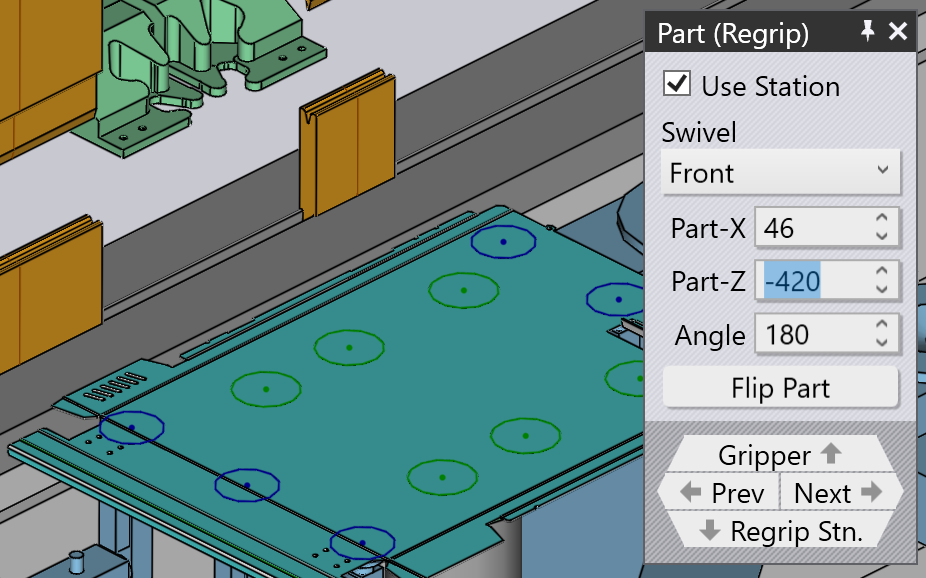
The Part (Regrip) panel is used to control the position of the part on the regripping station. It is accessed by clicking on the part during a regrip operation, or by using the navigation link from the Regrip Station panel, or the Gripper panel.
-
The Use Station toggle is used to control whether a regripping station is used for this operation or not. Though Flux will always allow you to turn this off, note that large parts cannot reliably be regripped at clamping - they will require a regripping station. Use care when turning this off.
-
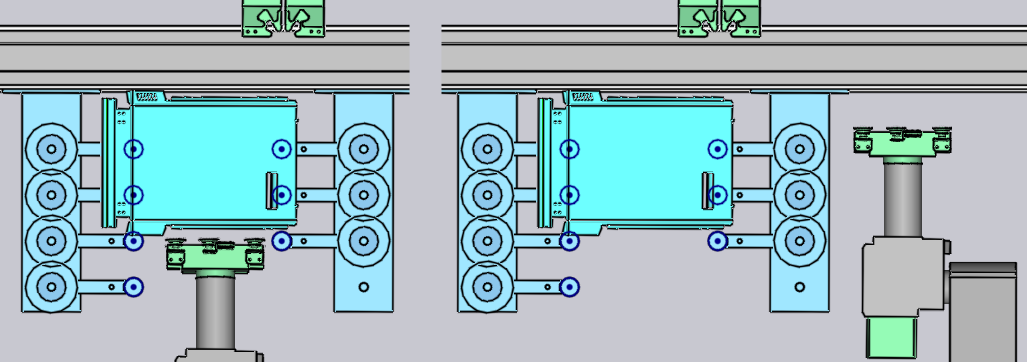
The Swivel selector is used to select the path by which the robot swivels down from the above the part to below the part. The image below shows the robot going around the part using the front route, or using the right route.
-
The Part-X, Part-Z and Angle settings are used to control the position and orientation of the part on the regripping station. As you move the part, the gripper holds on and follows the part, so all collisions between the part, gripper, robot, regrip stations, press table, tools are computed and displayed in real time.
-
The Flip Part button is used to place the part upside down relative to the current position. Sometimes this is useful to avoid some collisions between downward facing flanges and the regrip station arms. Flux will immediately recompute a new robot path when you flip the part.
-
The Remove Regrip button is displayed only in situations where this regrip operation could possibly be removed. In general, if we need to hold the part from the other side to continue processing, such regrip operations cannot be removed.
If a regripping station is not being used, the panel is much simpler since the part position cannot be controlled (it depends on the clamping position of the part between punch and die):
Gripper panel
The Gripper panel is used to control the position of the gripper on the part. This is the gripper position after the repositioning.
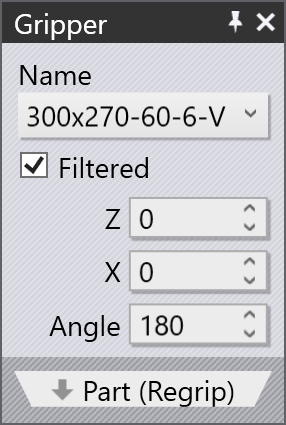
You can also use this to change the gripper, and in this case all the steps of the bending are recalculated using this new gripper.
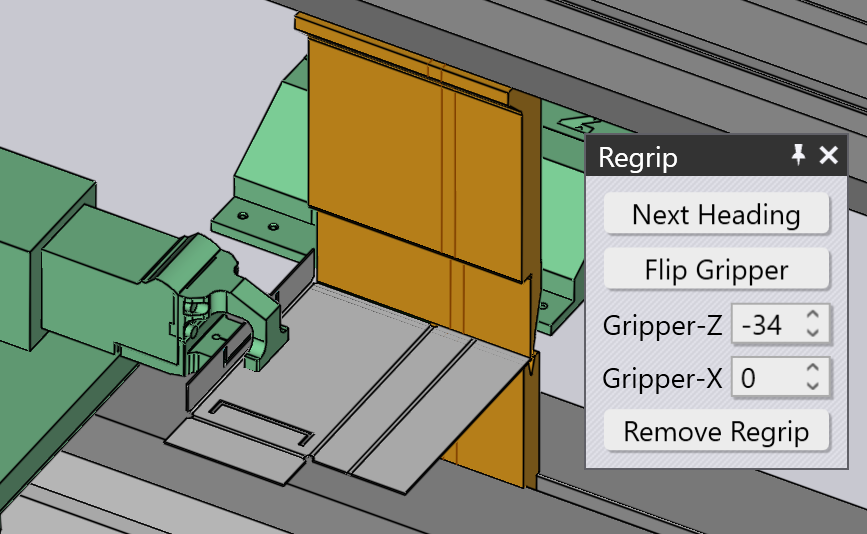
Regip with a Mechanical Gripper
You can also program a regrip operation when a jaw gripper (mechanical gripper) is being used. First, you can add a regrip operation between any two bends, by opening the Robot Path panel for the second of these bends.[1], and clicking on the Add Regrip button there. After a regrip operation is added, you can click on the R1 cell in the navigator, or on the robot to edit the regrip operation:
-
Use the Next Heading button to rotate the gripper around to another side of the part (it rotates in 90° steps).
-
Use the Flip Gripper button to flip the gripper neck upside down.
-
Use the Gripper-Z and Gripper-X settings to fine-tune the gripper position on the part.
As you make these changes, Flux will compute a routing path for the gripper to go around the part and pick it up from the other side. All subsequent bends will also have their collision status updated immediately so you can see whether the new regrip position you have chosen is acceptable.
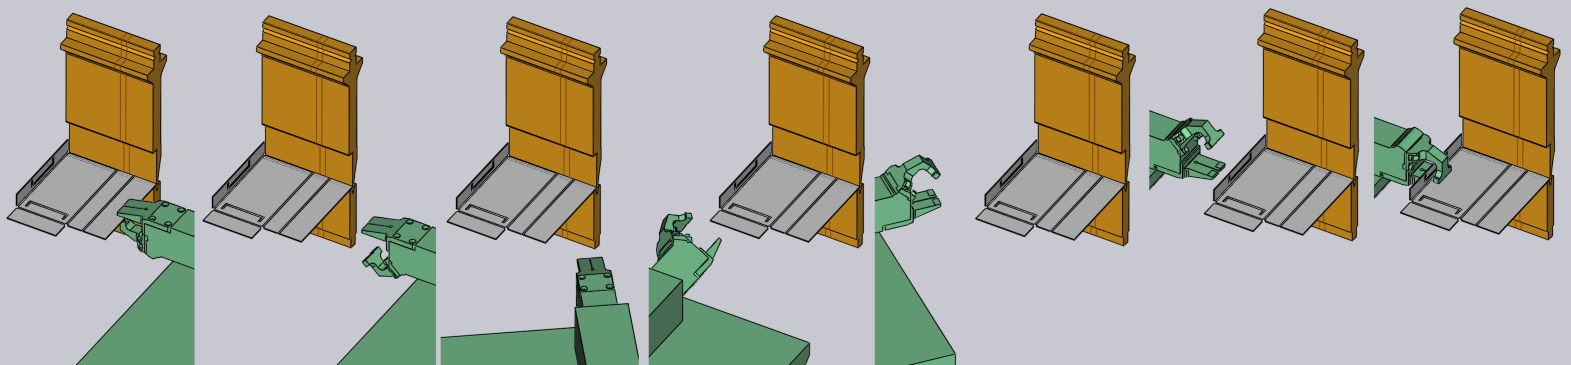
You can see below a typical route that Flux computes to take the gripper around to the other side: